Cutting cornice accurately is the difference between a professional-looking finish and visible gaps that undermine even the best interior design. Whether you’re a DIY-savvy homeowner or a trade professional, understanding the right tools, angles, and methods will save time, reduce waste, and deliver crisp results.
This guide is written for Irish interiors and modern materials—showing how precision-made, lightweight cornice simplifies the process and helps you achieve clean joins first time.
Why Cutting Cornice Correctly Matters More Than You Think
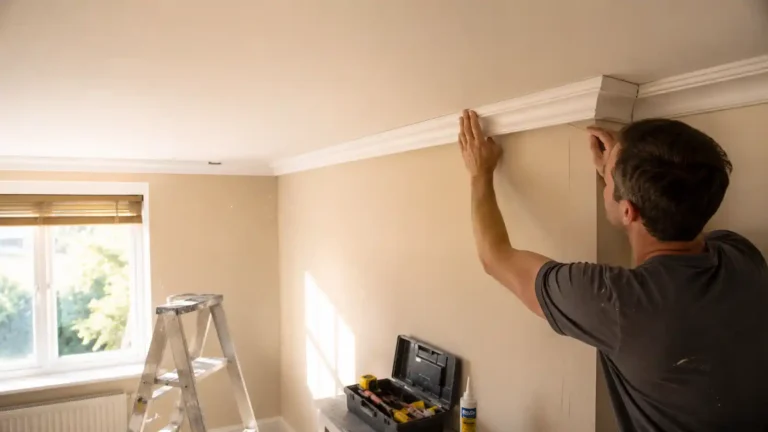
Cornice sits at the most visible junction in a room: where walls meet ceilings. Poor cuts lead to:
- Gaps at internal and external corners
- Misaligned profiles along straight runs
- Extra filling and sanding (or re-cuts and delays)
High-quality cornice is designed with consistent dimensions and sharp detail—but it still relies on accurate cutting to perform at its best.
What Type of Cornice Are You Cutting?
Before you pick up a saw, identify the material. Cutting technique—and tolerance for error—changes by type.
Lightweight Polyurethane & Polystyrene Cornice
- Consistent profiles = predictable cuts
- Lightweight and stable
- Ideal for DIY and professional installs
- Clean edges that paint well
These properties are why modern mouldings from Gaudi Coving are trusted on both residential and commercial projects across Ireland.
The same precision cutting principles also apply when installing decorative architrave, where accurate joints and clean edges are essential for a professional finish around doors and openings.
Traditional Plaster Cornice
- Heavier and more fragile
- Susceptible to chipping
- Often requires specialist handling
Timber Cornice
- Common in cabinetry and joinery
- Grain and movement affect accuracy
- Different techniques apply (see comparison guide)
👉 Related: Timber vs Polyurethane Cornice: Cutting Methods Compared
Tools You Need to Cut Cornice Accurately
Essential Tools
- Mitre saw (manual or powered)
- Fine-tooth saw or blade
- Mitre box (for simple DIY setups)
- Tape measure, pencil, straight edge
Recommended for Best Results
- Adjustable mitre saw with angle stops
- Test pieces (offcuts)
- Fine sanding block for light edge finishing
Lightweight cornice is forgiving and tool-friendly—reducing fatigue and improving accuracy.
Understanding Cornice Angles (Before You Cut)
Most mistakes happen because angles are misunderstood.
- Internal corners: corners that turn into the room
- External corners: corners that project out
- Walls are rarely a perfect 90°—always allow for adjustment
- Orientation matters: mark ceiling edge and wall edge before cutting
How to Measure Cornice Correctly
- Measure each wall run individually
- Mark start and end points clearly
- Account for corners before cutting
- Dry-fit lengths to confirm alignment
- Order 10–15% extra to allow for cuts and waste
Cutting Cornice: Flat vs Nested Methods
Cutting Cornice Flat (Most Common Today)
- Cornice is laid flat on the saw bed
- Ideal for lightweight polyurethane profiles
- Delivers consistent, repeatable results
- Works well with powered mitre saws
Cutting Cornice Nested (Traditional Method)
- Cornice sits in the mitre box as it would on the wall
- Can be tricky with deeper profiles
- Less forgiving if walls aren’t square
Cutting Cornice for Kitchens & Cabinet Runs
Kitchens demand tighter tolerances:
- Shorter runs magnify errors
- Visible joins above cabinets
- Moisture resistance is essential
Use precise measurements, test cuts, and modern lightweight cornice for clean results.
How to Cut Internal & External Corners Cleanly
- Identify corner type first
- Cut test pieces before final lengths
- Check orientation twice—cut once
- Fine-tune angles to account for wall variance
Patience here prevents filling later.
Common Cornice Cutting Mistakes (And How to Avoid Them)
- Cutting the wrong orientation (left/right reversed)
- Assuming walls are perfectly square
- Skipping test cuts
- Using timber techniques on lightweight mouldings
- Rushing without marking edges
A methodical approach beats speed every time.
DIY vs Trade Cutting: What’s Realistic?
DIY Works Well When:
- Rooms are straightforward
- Using lightweight, precision mouldings
- Proper tools are available
Trade Experience Helps When:
- Period properties with uneven walls
- Multiple external corners
- Large-scale or commercial projects
Modern materials make DIY far more achievable than with traditional plaster.
Similar precision is often required when working with decorative balustrades, where accurate measurements and clean cuts help maintain a consistent architectural appearance throughout a property.
Why Lightweight Cornice Is Easier to Cut Accurately
- Dimensional stability
- Crisp edges with minimal chipping
- Faster handling and positioning
- Cleaner finish after painting
These benefits reduce stress on site and deliver consistent results—why professionals increasingly specify modern polyurethane mouldings.
Frequently Asked Questions About Cutting Cornice
Final Tips for a Professional Finish
- Dry-fit before fixing
- Label each piece clearly
- Keep blades sharp
- Work methodically, not quickly
- Choose quality mouldings designed for easy installation
Final Thoughts: Precision Starts with the Right Cornice
Accurate cutting isn’t just about skill—it’s about material quality and consistency. Modern, European-inspired mouldings designed for easy installation make clean cuts achievable for DIYers and reliable for professionals.
The same attention to detail benefits other decorative architectural features, including keystones, where precise installation helps create a more refined and visually balanced design.
With Gaudi Coving, precision profiles, lightweight construction, and moisture-resistant materials help ensure your cutting—and your finish—looks professional every time.
A precise, sleek profile such as the GAUDI 1.50.145 cornice is a good one to start with while you get the angles and tools right.