To figure out how much coving you need, measure your room’s perimeter in metres, accounting for corners and architectural features like bay windows. Use tools like a tape measure, spirit level, and laser level for accuracy. Factor in the cost differences of materials like plaster, polystyrene, or wood, as well as installation techniques. Remember, larger rooms need more coving, and intricate patterns will increase costs. There’s much more to reflect upon for a seamless installation.
Once you know how many lengths you need, see our coving cost guide for Ireland for real 2026 prices per length, room-by-room budgets, and fitting costs.
Key Takeaways
- Measure the entire room perimeter to determine the total coving length needed.
- Factor in extra material for corners and potential waste during installation.
- Choose materials based on budget and desired durability; options include plaster, polystyrene, and wood.
- Larger rooms and intricate patterns increase coving costs due to more material and labor.
- Use a project checklist and timeline to ensure a smooth and efficient installation process.
Understanding Coving and Its Purpose
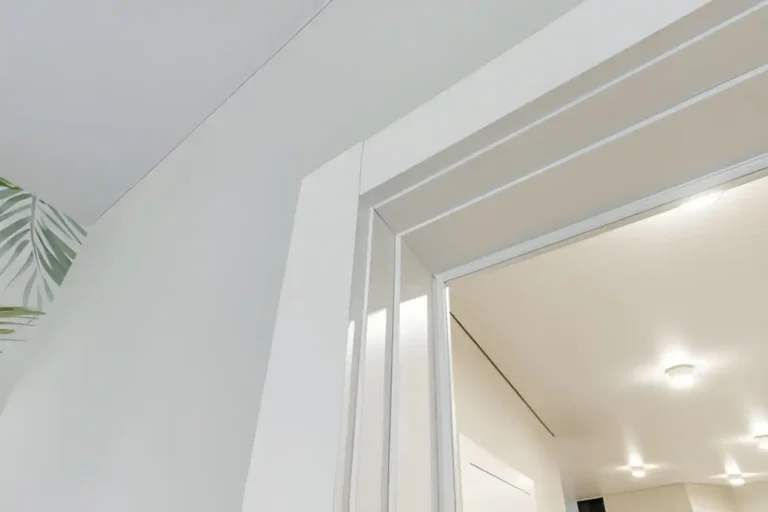
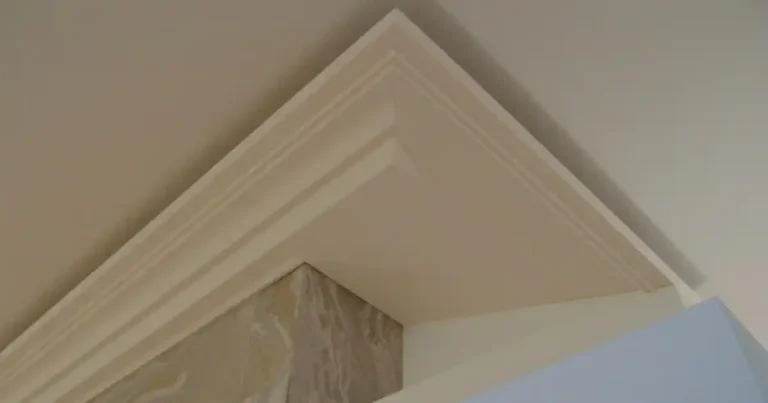
Coving, a decorative moulding that graces the junction between walls and ceilings, brings an elegant touch to any room.
You’ll find that it’s more than just a visual delight—it’s a nod to tradition that can make your space feel truly homely.
With various coving styles like classic concave or ornate egg and dart, you’ve got plenty of design options to suit your taste.
Imagine walking into a room where the coving echoes the gentle curves of an Irish countryside or perhaps the stately elegance of a Georgian manor in Dublin.
Choosing the right coving style won’t only enhance your home’s aesthetic but also provide a sense of belonging, connecting you to a shared history and architectural heritage. For homeowners seeking a clean and understated look, plain cornice profiles offer a timeless solution that works well in both traditional and contemporary interiors.
Tools and Materials Needed for Measuring
When measuring for coving, you’ll want to have a reliable tape measure in hand, preferably one marked in centimetres for precise accuracy.
A spirit level is also essential to guarantee your lines are straight as a fiddle, keeping everything looking neat as a pin.
Don’t forget a pencil and notepad to jot down your measurements; it’s the quickest way to avoid any head-scratching later on.
Essential Measuring Tools
To accurately measure how much coving you’ll need, it’s essential to gather the right tools and materials beforehand. Having a trusty measuring tape in your toolkit is a must. This simple tool helps you measure the room’s perimeter with precision, ensuring you get the right amount of coving for those lovely nooks and crannies.
Pair your tape with a laser level for the best results. This nifty gadget projects a straight line across your wall, helping you achieve perfectly aligned coving. These tools aren’t just for professionals; they’re for you, too.
Embrace the satisfaction of a job well done, knowing your coving will fit just right, creating a cosy, polished finish that brings warmth to your home.
Coving Measurement Materials
Two essential items you’ll want in your toolkit for measuring coving are a sturdy measuring tape and a reliable laser level. These trusty tools guarantee accurate measurements for your coving project, whether you’re working with plaster, polystyrene, or MDF.
Understanding the coving material types you’ll be using can influence your choice of tools, especially when considering different coving installation methods.
Keep these handy items in your corner:
- Metric Measuring Tape: For precise measurements in centimetres and millimetres.
- Laser Level: Guarantees your coving is perfectly aligned, preventing any wonky installations.
- Pencil and Notepad: Jot down measurements immediately, as memory can be a fickle thing.
- Spirit Level: Cross-check your work, particularly in older Irish homes with charmingly uneven walls.
Arming yourself with these essentials connects you to a community of skilled DIYers!
Calculating the Perimeter of Your Room
Calculating your room’s perimeter is a straightforward task that guarantees you buy the correct amount of coving. First, grab your trusty measuring tape and determine the room dimensions in metres. Measure each wall’s length, keeping your tape taut for accuracy.
Once you’ve got these measurements, it’s time to apply the perimeter formula: simply add all the wall lengths together. For example, if your room is 4 metres by 3 metres, your perimeter is (4 + 3) x 2, equalling 14 metres.
Don’t forget, it’s important to measure in metres to match local standards. Armed with this number, you’ll feel like part of the community, confident you’re buying just what you need, avoiding unnecessary trips or purchases.
Accounting for Corners and Joints
While measuring the room’s perimeter is essential, it’s equally important to account for corners and joints. In the cosy nooks of your home, ensuring the coving fits snugly requires understanding corner angles and joint types. You wouldn’t want any gaps or misalignments, would you?
Here are some tips to evaluate:
- Corner Angles: Measure each corner’s angle precisely; most are 90 degrees, but older homes might surprise you.
- Joint Types: Decide whether you’ll use butt joints or mitre joints to connect pieces seamlessly.
- Internal vs. External Corners: Different techniques apply for inside and outside corners.
- Allow for Waste: Always add a bit extra for those unforeseen hiccups or mistakes.
With these tips, you’ll be well on your way to a flawless finish.
Estimating the Total Length of Coving Required
Having accounted for corners and joints, it’s time to figure out how much coving you’ll need for your space.
First, measure the perimeter of your room in metres, not forgetting any alcoves or bay windows.
Coving styles vary, from the traditional to the contemporary, so consider your design options as you plan.
Whether your heart leans towards intricate Victorian patterns or sleek modern lines, knowing the exact length is key to achieving a seamless finish.
Remember, a bit of extra coving never goes amiss—better to have a little left over than come up short.
This attention to detail guarantees your space feels complete and inviting, like a snug Irish pub on a chilly evening.
You’re sure to create a welcoming atmosphere.
Factors Affecting Coving Costs
When it comes to coving costs, several factors can greatly influence the overall price you’ll pay. Understanding these can help you make informed decisions and feel more connected to your home improvement journey.
Here’s what to think about:
- Coving Materials: Different materials, like plaster, polystyrene, or timber, vary in price. Each material offers distinct aesthetic and functional benefits.
- Installation Techniques: More complex techniques, like curved or bespoke designs, can increase labour costs, especially if you’re hiring a skilled tradesperson.
- Room Size: Larger rooms require more coving, affecting both material and installation expenses. Measure carefully in metres for accuracy.
- Additional Features: Intricate patterns or integrated lighting add an extra layer of expense but can greatly enhance your space.
Many homeowners also incorporate decorative ornaments alongside coving to create a more detailed and elegant interior design, particularly in period-style properties.
Budgeting for Your Coving Project
Budgeting for your coving project can be a straightforward process if you break it down into manageable steps.
Start by measuring your room in metres to get an accurate idea of how much coving you’ll need. With those figures, you can move on to the cost estimation phase.
Remember, prices can vary, so it’s wise to research local suppliers for the best deals. Consider any additional costs, like adhesive or paint, which might sneak into your budget.
Once you’ve got a rough estimate, it’s time for budget allocation. Divide your funds wisely, ensuring you’ve enough set aside for unexpected expenses.
Tips for Buying Coving Materials
When you’re buying coving materials, don’t skimp on quality—good craftsmanship will stand the test of time, much like the iconic stonework of Dublin’s cathedrals.
Measure your walls accurately in metres to avoid wastage or shortage; a measuring tape and a bit of patience will go a long way.
Material Quality Considerations
Selecting the right coving material is essential to ensuring the longevity and appearance of your home’s interior.
You’ll want to balance material durability with aesthetic appeal to create a warm and inviting space that feels truly yours. Here are some tips to keep in mind:
- Gypsum: Offers excellent durability and classic charm, perfect for traditional homes across Ireland.
- Polyurethane: Lightweight and easy to install, making it a popular choice for those seeking a quick facelift.
- Plaster: Exudes elegance and can be customised, though it requires expert handling.
- Polystyrene: Budget-friendly and easy to paint, but less durable for high-traffic areas.
Accurate Measurement Techniques
To guarantee you buy the right amount of coving for your home, begin by accurately measuring the perimeter of your room.
Use a measuring tape and note down every nook and cranny—don’t forget those lovely bay windows or chimneys that add character. For measurement accuracy, you’ll want to measure in feet and inches, as it’s more precise for our local needs.
Keep in mind the various coving styles available. Some styles may require additional lengths due to intricate designs or curves.
If you’re torn between styles, ask your local hardware store for guidance—after all, they’re part of the community too!
Double-check your measurements before heading out to buy. Measure twice, cut once, as the saying goes, ensuring a snug fit for your beloved home.
Planning Your Installation Process
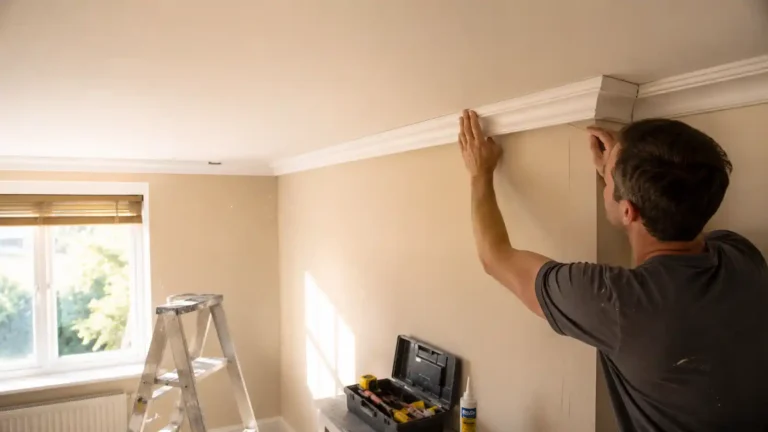
Before you plunge into the installation, a well-thought-out plan is your best ally.
By mapping out your installation timeline and creating a project checklist, you’ll avoid unnecessary hiccups and guarantee a smooth process.
Here’s how to get started:
- Measure Twice, Cut Once: Confirm all your coving pieces are cut to precise measurements in feet and inches.
- Gather Your Materials: Double-check you have all tools and materials, like adhesive and saws, at the ready.
- Assign Roles: If you’re working with friends or family, assign specific tasks to each person for efficiency.
- Prepare the Space: Clear the room and verify ceilings and walls are clean and dry.
With these steps, you’re set to transform your space with ease.
Frequently Asked Questions
Conclusion
You’ve measured your room’s perimeter, accounted for corners and joints, and estimated the total coving needed. You’ve considered costs, budgeted wisely, and shopped for materials with a keen eye for deals. Now, you’re ready to transform your space with a touch of elegance. Remember, every metre of coving adds charm, every pound you spend is an investment, and every step you take brings you closer to a beautifully finished room. Go on, make your home uniquely yours!
While coving enhances interior spaces, many homeowners extend the same architectural style outdoors with pediments exterior, creating a cohesive design that complements the character of the property.
Before you order, it’s worth reading How to Measure, Plan & Fix Coving for a Perfect Fit to get your measurements right first time. A versatile mid-range profile like the GAUDI 1.50.222 cornice is a useful reference point when budgeting length and cost.
Buying for a trade job, renovation company, or multiple properties? Gaudi Coving’s trade programme offers volume pricing and dedicated account support for bulk orders.