Fitting cornice above kitchen units is one of the final details that transforms a kitchen from functional to refined. But kitchens are unforgiving spaces: runs are short, joins sit at eye level, and heat and moisture can expose poor workmanship fast.
This guide shows how to fit cornice on kitchen units and cabinets using a clear, professional method. It’s written for DIY-savvy homeowners and trade installers, and focuses on modern, lightweight mouldings that are designed to install cleanly and stay secure long term.
To avoid confusing cabinetry trim with architectural moulding, see our explanation of cornice boards versus ceiling cornice.
Why Fitting Cornice in Kitchens Is Different
Kitchen cornice installation differs from ceiling cornice in living rooms or bedrooms because:
- Short runs magnify mistakes – gaps and steps are obvious
- Joins sit at eye level above cabinets
- Heat and steam test both materials and adhesive
- Cabinet alignment directly affects how straight the cornice looks
Accuracy, moisture resistance, and preparation matter more here than anywhere else.
What Type of Cornice Is Best for Kitchens?
Lightweight Polyurethane Cornice (Recommended)
Modern kitchens benefit most from lightweight mouldings because they are:
- Moisture-resistant
- Dimensionally stable (no movement with heat)
- Easy to handle above cabinets
- Designed for adhesive fixing
These are the properties found in mouldings supplied by Gaudi Coving, widely used in Irish kitchens where consistency and finish matter.
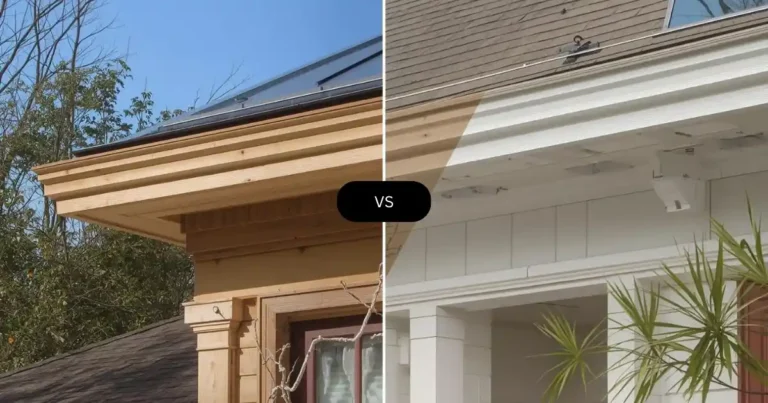
Timber Cornice (Brief Contrast)
- Often used in joinery-led kitchens
- More affected by heat and humidity
- Requires higher carpentry skill
- Greater risk of joints opening over time
For most modern kitchens, lightweight cornice is the practical choice.
Tools & Materials You’ll Need
Essential Tools
- Cornice adhesive
- Caulking gun
- Spirit level
- Tape measure and pencil
- Step ladder or platform
Helpful Extras
- Offcuts for test fitting
- Filling knife
- Damp cloth or sponge
- Fine sandpaper (after curing)
Preparation is especially important in kitchens where working space is limited.
Step 1 – Check Kitchen Units Before You Start
Before touching the cornice, inspect the cabinets.
- Check units are level and aligned
- Look for stepped cabinet tops
- Confirm consistent cabinet heights and depths
If cabinets are uneven, cornice will follow the problem. Correct alignment issues first.
Step 2 – Decide Where the Cornice Will Sit
In kitchens, cornice is typically fitted:
- From the top of cabinets to the ceiling, or
- Directly onto cabinet tops (design-dependent)
What matters most is consistency. Mixing heights or fixing methods creates visible breaks in the line.
Step 3 – Measure & Mark Guide Lines
Guide lines are essential for kitchen installations.
- Measure from the top of cabinets
- Use a spirit level to mark a consistent line along the wall
- Account for small cabinet height variations
- Never rely on the cabinet top alone as a reference
This step prevents sloping or stepped cornice lines.
Step 4 – Dry-Fit Kitchen Cornice Pieces
Dry-fitting is non-negotiable in kitchens.
- Dry-fit short runs above cabinets
- Check internal and external corner mitres
- Test straight joins
- Adjust cuts now, not after adhesive is applied
Step 5 – Apply Adhesive for Kitchen Cornice
Apply adhesive to:
- The wall edge of the cornice
- The ceiling or cabinet edge, depending on fixing position
Best Practice
- Use a continuous bead, not dots
- Kitchens benefit from slightly more adhesive for security
- Avoid squeezing adhesive onto cabinet finishes
Step 6 – Fix the Cornice Above Cabinets
- Position the cornice carefully along your guide line
- Press evenly into place—don’t force
- Check level immediately
- Clean excess adhesive straight away
- Work in short, controlled sections
Short runs make accuracy easier—but only if you slow down.
Step 7 – Handling Corners & Returns in Kitchens
Kitchens often include:
- Internal corners above cabinets
- External corners at cabinet ends
- Small return pieces to walls
Always:
- Test-fit returns
- Label small pieces clearly
- Avoid forcing short sections into place
Precision here defines the final look.
Step 8 – Allow Adhesive to Cure Fully
- Initial grab happens quickly
- Full cure usually takes 24 hours
- Avoid movement near cabinets during curing
- Don’t fill or sand until adhesive has fully set
Patience prevents future cracking.
Step 9 – Fill, Sand & Finish
Once cured:
- Fill small gaps above cabinets
- Lightly sand joints and corners
- Inspect under strong kitchen lighting
- Prepare for painting
Good fitting means minimal filling.
Step 10 – Painting Kitchen Cornice
- Paint after fitting, never before
- Cornice is often painted to match the ceiling
- Use moisture-resistant paint suitable for kitchens
- Two light coats give the cleanest finish
This final step ties the cornice into the kitchen design.
Common Kitchen Cornice Fitting Mistakes
- Not checking cabinet level first
- Skipping guide lines
- Using non-moisture-resistant cornice
- Applying too little adhesive
- Rushing short runs
Most kitchen cornice issues come from speed, not difficulty.
DIY vs Professional Kitchen Cornice Fitting
DIY-Friendly Kitchens
- Straight cabinet runs
- Lightweight modern cornice
- Careful measuring and dry-fitting
When Professional Installation Helps
- Complex layouts
- Multiple external corners
- High-end fitted kitchens
Modern materials have made DIY kitchen cornice far more achievable than in the past.
Frequently Asked Questions About Kitchen Cornice
Final Tips for a Clean Kitchen Finish
- Check cabinet alignment first
- Dry-fit every piece
- Work methodically in short sections
- Clean adhesive immediately
- Let adhesive fully cure before finishing
Final Thoughts: Kitchens Reward Precision
Kitchens highlight both good and bad workmanship. When cornice is fitted accurately above cabinets, it elevates the entire space and creates a built-in, intentional finish.
Modern lightweight cornice simplifies the process, but success still comes down to method. With careful preparation, correct fixing, and a step-by-step approach, professional results are achievable—whether you’re a homeowner or a trade installer.
That’s why so many Irish kitchens rely on Gaudi Coving—for precision profiles designed to install cleanly, resist moisture, and finish beautifully in demanding kitchen environments.
Kitchen units call for a restrained profile that won’t compete with cabinetry — the GAUDI 1.50.113 cornice is a good example of the versatile, understated style that works well here.