If you’re renovating a period home in Dublin, Cork, or Galway, you’ve likely discovered something frustrating:
Your walls aren’t straight.
Older Irish homes — from Victorian terraces to 1930s semis — rarely have perfectly flat plaster. Decades of settlement, layered renovations, and old lime plaster mean walls can bow, dip, or twist slightly.
And when you try to install new trim?
You get:
- Visible gaps
- Open mitre joints
- Architrave rocking on the wall
- Cracks appearing weeks later
If you’re searching for how to fit architrave on uneven walls, this guide will show you the professional techniques that prevent gaps and deliver a clean, architectural finish — even in older properties.
For a wider overview of profiles, materials and planning, see our complete guide to architrave in Irish homes.
Why Walls Are Uneven in Irish Homes
Before solving the problem, it helps to understand why it happens.
1️⃣ Old Lime Plaster & Settlement
Victorian and Georgian homes often used lime-based plaster. Over decades:
- Walls subtly shift
- Corners move
- Surfaces become slightly bowed
Even a few millimetres of variation can cause visible gaps behind architrave.
2️⃣ Multiple Renovation Layers
Many period properties have:
- Plaster over original plaster
- Patch repairs
- Previous DIY work
These layers create inconsistent surfaces.
3️⃣ Masonry Irregularities
In 1930s semis especially:
- Brickwork isn’t perfectly square
- Corners are rarely a perfect 90°
- Door frames may not sit flush
This is completely normal — but it requires the right approach.
Biggest Problems When Fitting Architrave on Uneven Walls
If you install architrave the same way you would in a new-build, you’ll likely run into:
- Gaps between architrave and plaster
- Mitres that open over time
- Excessive filler use
- Cracking along joints
- Fixings pulling away
The key difference in renovation work is adaptation — not force.
Step 1 – Check the Wall Before You Cut Anything
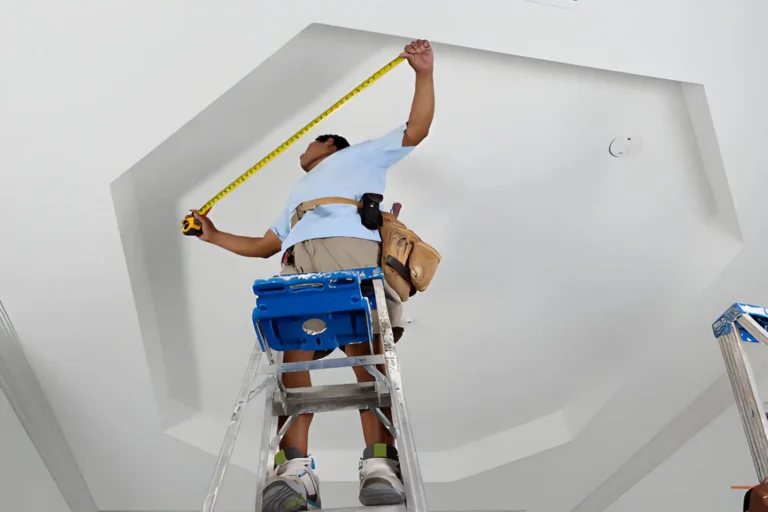
Never cut your architrave before assessing the wall.
Use a Straight Edge or Spirit Level
Hold it vertically along:
- Both sides of the door frame
- The top horizontal area
Look for:
- High spots
- Dips
- Bowed plaster
Even slight curves will affect how your trim sits.
Mark Problem Areas
Lightly pencil where:
- The wall bows inward
- The plaster bulges outward
This helps you plan adjustments before fixing.
Preparation here prevents wasted cuts later.
Step 2 – Use the Scribing Technique (Professional Solution)
This is the most important technique when fitting architrave on uneven walls.
What Is Scribing?
Scribing means carefully shaping the back edge of the architrave so it follows the exact contour of the wall.
Instead of forcing the wall to be straight — you adapt the trim to match it.
How to Scribe Architrave to an Uneven Wall
- Hold the cut architrave in position.
- Press it against the wall along your reveal line.
- Use a pencil to trace the wall’s contour onto the back edge of the moulding.
- Remove the piece and gently trim along that line using:
- A block plane
- Sandpaper
- A multi-tool (carefully)
- Refit and test again.
You may need to repeat this process gradually.
Remove small amounts at a time — never overcut.
Why Scribing Works So Well in Period Homes
Because it:
- Eliminates visible wall gaps
- Reduces need for excessive caulk
- Creates a flush, professional finish
- Prevents stress on mitre joints
In Dublin period renovations, scribing is often the difference between average and exceptional trim work.
Step 3 – Adjust Your Mitre Strategy
When walls are uneven, corners are often slightly off-square too.
Many installers assume a perfect 45° angle — but in older homes, that’s rarely accurate.
Don’t Assume a Perfect 45°
Before cutting:
- Check the corner angle with an angle finder
- Test-fit scrap pieces
If the corner is slightly more or less than 90°, adjust your mitre accordingly.
Even a 1–2° difference can close a visible gap.
Mitre vs Coping Joints on Uneven Walls
Mitre joints:
- Traditional
- Clean finish
- Best for consistent corners
Coping joints:
- One piece is shaped to overlap the other
- More forgiving on irregular corners
In highly uneven period properties, coping can sometimes produce better long-term results.
Step 4 – Use the Right Adhesive (Flexibility Matters)
Rigid fixing methods often cause cracks later.
Why Standard Wood Glue Isn’t Enough
- Too rigid
- Doesn’t accommodate wall movement
- Can lead to separation over time
Older Irish homes continue to shift subtly — especially with temperature changes.
Flexible High-Grip Adhesive (Recommended)
A quality flexible construction adhesive:
- Fills minor wall gaps
- Absorbs slight movement
- Reduces cracking risk
- Improves long-term durability
Apply adhesive in a zig-zag pattern to allow compression into uneven plaster.
This is particularly important on solid brick walls.
Why Lightweight Mouldings Make a Huge Difference
Material choice matters even more when walls are uneven.
The Problem with Heavy Materials
Plaster mouldings:
- Heavy
- Hard to hold flush
- Increase strain on fixings
- More likely to crack at mitres
MDF:
- Can swell in moisture
- Harder to manipulate during scribing
- Edges can crumble when reshaped
The Advantage of High-Density Polyurethane
Lightweight polyurethane mouldings:
- Easier to press flush against uneven plaster
- Simpler to scribe
- Put less stress on joints
- Resist cracking
- Are moisture-resistant (important in Irish climate)
When renovating period homes, lighter materials reduce both labour time and future call-backs.
This is especially valuable for trade professionals working across multiple doors.
Step 5 – Fixing the Architrave Properly
Once your piece is scribed and dry-fitted:
- Apply flexible adhesive generously.
- Press into place along your reveal line.
- Use a spirit level to check alignment.
- Pin lightly if necessary (especially on high spots).
Avoid over-nailing — too many fixings can distort the trim against uneven surfaces.
Let the adhesive do the majority of the work.
Step 6 – Caulking & Finishing for a Seamless Look
Even with careful scribing, tiny imperfections can remain.
Use Decorator’s Caulk Along Wall Edge
- Apply thin bead
- Smooth with damp finger or finishing tool
- Don’t overfill
This blends micro-gaps invisibly.
Fill Mitres Carefully
Use lightweight filler:
- Apply sparingly
- Sand gently once dry
Overfilling mitres can make joints more visible after painting.
Paint Preparation
- Prime if required
- Apply two finish coats
- Lightly sand between coats for a flawless result
Once painted, small irregularities disappear — but only if the preparation was done correctly.
Common Mistakes to Avoid in Period Homes
❌ Forcing Architrave Against the Wall
This creates tension that leads to cracks later.
❌ Skipping Scribing
Caulk alone won’t fix uneven plaster.
❌ Assuming Perfect 45° Corners
Test angles first.
❌ Using Cheap MDF in Damp Areas
Edges can swell and separate.
❌ Overusing Nails
Let adhesive provide flexibility.
How Long Does It Take to Fit Architrave on Uneven Walls?
Expect installation on uneven walls to take:
- 25–40% longer than standard installs
The extra time comes from:
- Wall assessment
- Scribing
- Angle adjustments
However, using lightweight mouldings significantly reduces:
- Fatigue
- Adjustment time
- Risk of future cracking
For trade professionals, this means fewer call-backs and a more reliable finish.
When to Replace Instead of Patch
Sometimes old architrave is:
- Warped
- Water-damaged
- Severely cracked
- Installed poorly
In these cases, full replacement often delivers better results than trying to patch and repair.
Especially in high-value renovations, upgrading to durable, moisture-resistant profiles improves both aesthetics and longevity.
FAQs
Renovating a Period Home? Choose Mouldings Designed for Irish Walls
Installing architrave on uneven walls requires:
- Careful measuring
- Proper mitre adjustments
- Scribing skill
- Flexible fixing methods
- Stable, durable materials
The right moulding makes all the difference.
Lightweight, paint-ready, moisture-resistant profiles:
- Install cleaner
- Adapt more easily to irregular plaster
- Reduce cracking
- Deliver long-term durability
👉 Shop Paint-Ready Architrave Profiles
- Designed for renovation projects
- Ideal for Dublin period homes
- Lightweight for easier installation
- Moisture-resistant
- Trusted by Irish trade professionals
- Nationwide delivery
Because in older homes especially, the finish must adapt to the building — not fight against it.