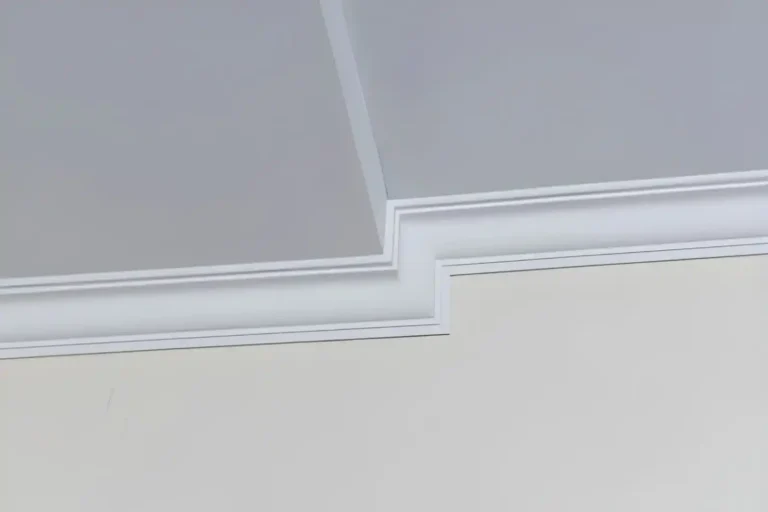
If you’re asking “how do I fix cornice so it stays put long-term?”, you’re asking the right question. Cornice problems rarely come from poor cutting alone — they come from incorrect fixing.
This practical guide explains how to attach cornice to walls and ceilings securely, using modern adhesive-based methods trusted by both DIY installers and professionals. Follow this approach and your cornice will remain solid, crack-free, and visually sharp for years.
Why Secure Cornice Fixing Matters
Cornice sits under constant tension between walls and ceilings. When fixing is done poorly, common issues include:
- Cornice pulling away from the wall or ceiling
- Sagging along long runs
- Cracking at joints and corners
- Repeated filling and repainting
The good news: modern cornice is designed to be fixed with adhesive alone. When the right materials and method are used, mechanical fixings are unnecessary in most residential and commercial interiors.
👉 Related pillar guide: How to Fit Ceiling Cornice Like a Professional
What Type of Cornice Are You Attaching?
Before choosing a fixing method, identify the cornice material.
Lightweight Polyurethane & Polystyrene Cornice
This is the most common type used in modern interiors.
- Specifically designed for adhesive fixing
- Lightweight, so no screws or nails required
- Stable and moisture-resistant
- Ideal for DIY and professional installation
This is the category supplied by Gaudi Coving, engineered for secure bonding and long-term reliability in Irish homes.
Traditional Plaster Cornice (Brief Contrast)
- Heavy and brittle
- Often requires mechanical fixings
- Typically trade-installed
The rest of this guide focuses on modern lightweight cornice, as it represents the majority of current installations.
What You Need to Attach Cornice Securely
Adhesives & Fixings
Use a dedicated cornice or high-grab adhesive designed for architectural mouldings.
What to look for in an adhesive:
- Strong initial grab
- Slight flexibility once cured
- Compatibility with painted surfaces
Avoid:
- Cheap general-purpose grab glues
- Brittle adhesives that crack over time
These often fail under long-term tension.
Essential Tools
- Caulking gun
- Filling knife
- Spirit level
- Damp cloth or sponge (for excess adhesive)
Having everything ready before you start prevents rushed mistakes.
Preparing Walls & Ceilings for Secure Fixing
Adhesive strength depends entirely on surface preparation.
- Clean all surfaces — remove dust, grease, and loose paint
- Check wall and ceiling flatness — note dips or uneven areas
- Mark guide lines using a spirit level for consistent positioning
- Dry-fit all cornice pieces before applying adhesive
Adhesive will not bond properly to dirty or unstable surfaces.
Where to Apply Adhesive on Cornice
This is the most important technical step.
Adhesive Placement
Apply adhesive to both contact edges:
- Along the wall edge
- Along the ceiling edge
Best Practice
- Use a continuous bead, not spaced dots
- Apply generously — excess can be cleaned
- Avoid thin, broken lines
Why This Matters
Full adhesive contact:
- Prevents future movement
- Distributes load evenly
- Reduces cracking at joints
Too little adhesive is the most common cause of failure.
How to Attach Cornice to the Wall & Ceiling (Method Overview)
- Position the cornice carefully along your guide lines
- Press evenly into wall and ceiling — don’t force
- Check level and alignment immediately
- Clean excess adhesive with a damp cloth
- Hold briefly until initial grab takes effect
Modern adhesives grab quickly, but final strength develops over time.
Do You Need Screws or Nails to Fix Cornice?
Short answer: usually no for modern lightweight cornice.
When Temporary Support May Help
- Very long lengths
- Uneven or bowed walls
Temporary pins or tape can be used only until adhesive grabs, then removed.
Why Permanent Fixings Are Rarely Needed
- Lightweight cornice places minimal load on adhesive
- Screws can cause cracking or distortion
- Adhesive provides continuous support, unlike point fixings
Attaching Cornice in Kitchens & Moisture-Prone Areas
Kitchens introduce:
- Heat
- Steam
- Short, highly visible runs
Best Practice
- Use moisture-resistant cornice
- Apply adhesive generously
- Dry-fit above cabinets to ensure alignment
- Allow full cure time before painting
Fixing above cabinets requires extra care, but the method remains adhesive-based.
Attaching Cornice at Joints & Corners
Secure fixing isn’t just about the wall — joints matter too.
Apply adhesive:
- To internal corner faces
- To external corner faces
- To straight joint faces
This prevents:
- Joint separation
- Hairline cracks after painting
Always press joint faces together firmly and clean excess immediately.
Common Cornice Fixing Mistakes (And How to Avoid Them)
- Using too little adhesive
- Skipping surface preparation
- Not pressing cornice fully into place
- Moving cornice before adhesive sets
- Painting before full cure
Most failures come from rushing, not from product quality.
How Long Should Cornice Adhesive Cure?
- Initial grab: usually within minutes
- Handling strength: a few hours
- Full cure: typically 24 hours
Best Practice
- Fill joints only after adhesive has cured
- Sand lightly once dry
- Paint after all movement has stopped
Patience here prevents future cracking.
DIY vs Professional Fixing: What’s Realistic?
DIY-Friendly Scenarios
- Lightweight mouldings
- Straightforward rooms
- Proper preparation and method
When Trade Fixing Is Advisable
- Large-scale projects
- Uneven or damaged walls
- High ceilings or commercial interiors
Modern cornice has made DIY installation far more achievable than traditional plaster ever was.
Frequently Asked Questions About Attaching Cornice
Final Tips for a Secure, Long-Lasting Fix
- Prepare surfaces thoroughly
- Use the correct adhesive
- Apply adhesive generously and evenly
- Dry-fit everything first
- Allow full cure before finishing
Final Thoughts: Secure Fixing Is the Foundation of a Professional Finish
Cornice longevity depends on how well it’s fixed. Modern lightweight materials have removed much of the difficulty, but correct adhesive use remains essential.
When installed properly, cornice stays secure, joints remain tight, and the finish looks intentional for years — not months. Precision-made profiles combined with the right fixing method deliver confidence, whether you’re a homeowner or a professional installer.
That’s why many Irish projects rely on Gaudi Coving — for mouldings designed to bond securely, install easily, and perform reliably in real interiors.
The GAUDI 1.50.158 cornice is a good example of the versatile profile that attaches cleanly using the method above.