How to cut coving corners? Cutting coving corners is where most DIY projects slow down—or go wrong. Internal corners that don’t meet cleanly, external corners that look uneven, or pieces cut the wrong way around can quickly turn a simple job into a frustrating one.
The good news? With the right method and modern lightweight coving, clean, professional-looking corners are absolutely achievable.
This guide explains how to cut coving corners, including internal and external corners, how to cut polystyrene coving, and how to use a coving mitre tool—step by step.
Why Cutting Coving Corners Is the Hardest Part
Most installation issues come down to cutting—not fixing. Corners require accuracy, correct orientation, and a clear understanding of which way the coving sits on the wall and ceiling.
Problems usually happen when:
- Pieces are cut the wrong way around
- Internal and external corners are confused
- Cuts aren’t tested before fixing
Modern lightweight coving dramatically reduces these risks, making mistakes easier to correct before installation.
Understanding Coving Corners
Before you cut anything, it’s essential to understand the two corner types you’ll encounter.
What Are Internal Coving Corners?
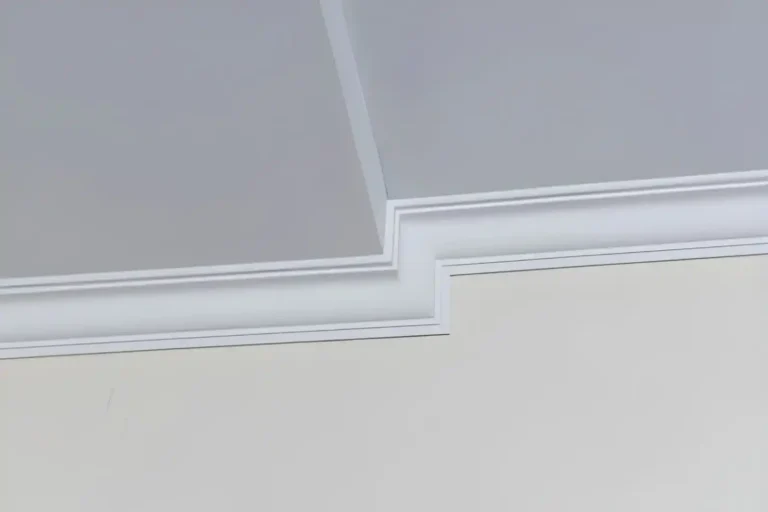
Internal corners are the inside angles of a room—where two walls meet and turn inward. Most rooms have four internal corners.
These are usually the easiest to cut once orientation is understood.
What Are External Coving Corners?
External corners are outward-facing angles, such as:
- Chimney breasts
- Bay windows
- Boxed-in structural elements
They require more attention, as the angle projects into the room and is more visually noticeable.
Tools You Need to Cut Coving Accurately
Mitre Box vs Coving Mitre Tool
- Mitre box: A general-purpose tool suitable for basic cuts
- Coving mitre tool: Designed specifically for coving, with preset angles and orientation guides
For most DIY projects, a coving mitre tool makes the process faster and more intuitive.
Best Saws for Lightweight Coving
Use a:
- Fine-tooth hand saw
- Small backsaw
Heavy plaster saws are unnecessary and increase the risk of damage.
How to Use a Coving Mitre Tool
Setting the Coving Correctly in the Tool
This is the most important step.
- The ceiling edge must sit against the correct face of the mitre tool
- The wall edge must sit against the other face
- Always double-check orientation before cutting
Many cutting errors come from placing the coving upside down.
Cutting Left- and Right-Hand Pieces
Internal and external corners require two mirrored cuts:
- One for the left side
- One for the right side
Label pieces lightly with a pencil to avoid confusion before fixing.
How to Cut Coving Internal Corners
Step-by-Step: Internal Corner Cuts
- Measure the wall length to the corner
- Place the coving into the mitre tool in the correct orientation
- Cut at the internal corner angle indicated on the tool
- Repeat for the adjoining wall
Test-Fitting Before Fixing
Always dry-fit both pieces together:
- Check alignment
- Look for gaps
- Make small adjustments if needed
Lightweight coving allows for minor trimming without cracking.
How to Cut Coving External Corners
Why External Corners Are Tricker
External corners are more visible and less forgiving. Small errors stand out more, so accuracy matters.
Step-by-Step: External Corner Cuts
- Measure carefully to the external edge
- Place the coving into the mitre tool using the external corner guides
- Cut slowly and cleanly
- Test-fit both pieces before fixing
Take your time—rushing external corners leads to visible gaps.
How to Cut Polystyrene Coving Cleanly
Why Polystyrene Is Easier to Cut
Polystyrene coving is:
- Lightweight
- Flexible
- Less prone to cracking
This makes it ideal for DIY installations and first-time projects.
Tips for Clean Cuts
- Use gentle, even pressure
- Let the saw do the work
- Avoid forcing the blade, which can tear edges
If edges aren’t perfect, small imperfections can be filled during finishing.
Common Coving Cutting Mistakes (And How to Avoid Them)
- Cutting pieces upside down
- Mixing up internal and external corners
- Forgetting to dry-fit before fixing
- Rushing the cutting stage
- Measuring once instead of twice
Slowing down and checking orientation prevents nearly all of these issues.
Do You Need Professional Tools?
Not at all. Most DIYers achieve excellent results using:
- A coving mitre tool
- A fine-tooth saw
- Careful measuring and test-fitting
Modern lightweight coving—like that supplied by Gaudi Coving—is specifically designed to reduce tool requirements and installation stress.
Frequently Asked Questions
Final Thoughts: Clean Cuts Lead to a Professional Finish
Cutting coving corners doesn’t need to be intimidating. With a clear understanding of internal vs external corners, the right tools, and modern lightweight materials, you can achieve crisp joints and a professional finish—even on your first attempt.
Take your time, test-fit every cut, and let the coving work with you—not against you.
A balanced, versatile profile like the GAUDI 1.50.293 cornice is a reasonable one to practise corner cuts on before moving to a more detailed profile.