Is coving easy to fit yourself? If you’re renovating your home or simply upgrading a room, coving is one of those finishing touches that can completely transform the space. But one question comes up again and again:
Is coving easy to fit yourself, or is it better left to professionals?
This guide gives you a straight, honest answer—no fluff, no unrealistic DIY promises—so you can decide what’s right for your home, budget, and skill level.
What Is Coving and Why Homeowners Choose It
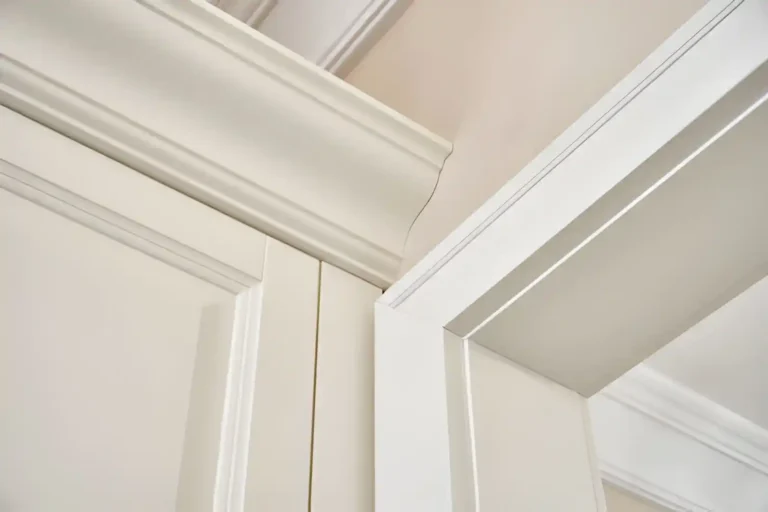
Coving, also known as ceiling moulding or cornice, is a decorative strip installed where walls meet the ceiling. It softens the harsh 90-degree angle and creates a seamless transition that feels more refined and architectural.
For Irish homeowners—especially those renovating period homes or upgrading modern interiors—coving plays a key role in achieving that “finished” designer look.
It’s not just about decoration. Coving can:
- Add depth and character to plain rooms
- Increase perceived property value
- Tie together other design elements like wall panelling or ceiling roses
- Elevate both traditional and contemporary interiors
In Ireland, coving is popular across:
- Victorian and Georgian homes
- New builds seeking a premium feel
- Renovation projects aiming for architectural detail
Premium brands like Gaudi Coving have made it easier than ever to achieve a high-end look without the traditional complexity of plaster installation. Their modern materials combine durability, moisture resistance, and easier handling—making them particularly appealing for today’s homeowners and trade professionals alike.
👉 Internal anchor:
If you’re unsure who typically installs coving, see “is coving a plasterer’s job or can anyone do it?”
So, Is Coving Easy to Fit Yourself? The Honest Answer
Here’s the truth:
Yes, coving can be easy to fit yourself—but only under the right conditions.
The difficulty depends on three main factors:
- The material you choose
- Your DIY experience
- The condition of your walls and ceilings
Difficulty Levels Explained
Beginner (Easy DIY)
- Polystyrene coving
- Polyurethane coving
- Lightweight, forgiving materials
Intermediate (Moderate DIY)
- Pre-primed MDF
- Duropolymer coving
- Requires more precision and cutting accuracy
Advanced (Difficult / Professional)
- Traditional plaster coving
- Heavy, fragile, and less forgiving
When Coving Is Easy (DIY-Friendly Scenarios)
Coving is genuinely DIY-friendly when:
- Walls and ceilings are straight and even
- You’re working in a small room (like a bedroom or home office)
- You’re using lightweight materials
- You have basic DIY tools
In these cases, many Irish homeowners complete the job in a single afternoon.
When Coving Becomes Difficult
This is where expectations need to be realistic.
Coving becomes challenging when:
- Walls and ceilings are uneven (very common in older Irish homes)
- You need precise mitre cuts for corners
- You’re installing large or ornate profiles
- You’re working with plaster coving
Corners, in particular, are where most DIYers struggle. Even slight angle errors can leave visible gaps that require time and skill to fix.
Wondering about materials? Read “is polystyrene coving easy to install vs plaster coving?”
What Makes Coving Easy or Hard? (Key Factors Explained)
Understanding what affects difficulty will help you avoid costly mistakes.
Material Type (The Biggest Factor)
Your material choice determines everything—from weight to cutting difficulty.
Tools Required
Basic tools include:
- Mitre box or saw
- Adhesive
- Tape measure
- Caulk or filler
More advanced materials may require specialised cutting tools.
Room Condition
- New builds = easier installation
- Older homes = uneven surfaces, more adjustments
Your DIY Experience
Even basic DIY skills can be enough—but patience and accuracy are essential.
Material Comparison Snapshot
- Polystyrene → Easiest, lightweight, beginner-friendly
- Polyurethane → Durable, slightly more premium, still DIY-friendly
- Plaster → Heavy, fragile, best left to professionals
DIY Coving Installation: Step-by-Step Overview
This is a simplified overview to help you understand the process.
Tools & Materials You’ll Need
- Coving adhesive
- Mitre box or saw
- Measuring tools
- Caulk or filler
Basic Installation Steps
- Measure and mark your walls carefully
- Cut angles using a mitre box (this is the hardest step)
- Apply adhesive to the coving
- Press into place along the wall-ceiling junction
- Fill gaps and paint for a seamless finish
Common DIY Mistakes to Avoid
- Incorrect angle cuts
- Ignoring uneven ceilings
- Using too little adhesive
- Rushing the finishing stage
Most poor results don’t come from installation—they come from rushing the final detailing.
DIY vs Hiring a Professional: What Should You Do?
This comes down to three things: cost, quality, and time.
When DIY Makes Sense
DIY is a good option if:
- You’re budget-conscious
- You’re working on smaller rooms
- You’ve chosen simple coving profiles
- You enjoy hands-on projects
When to Hire a Professional
Hiring a professional is the smarter choice when:
- You’re renovating a period home
- You want a high-end finish
- The space is large or complex
- You’re using plaster coving
Cost Comparison: DIY vs Professional Installation in Ireland
DIY Costs
- Coving materials
- Adhesive and tools
- Your time
Professional Costs
- Labour fees
- Faster completion
- Higher-quality finish
In Ireland, labour costs can vary significantly depending on location and project complexity.
Long-Term Value
A key question:
Is it cheaper to DIY—or to do it right the first time?
Poor DIY installation can lead to:
- Rework costs
- Wasted materials
- Lower visual impact
Best Coving Types for Easy DIY Installation
For most homeowners, the goal is simple:
Easy to install, durable, and visually premium.
Polystyrene Coving (Best for Beginners)
- Extremely lightweight
- Budget-friendly
- Easy to cut and install
Polyurethane Coving (Best Balance)
- Stronger and more durable
- Moisture-resistant (ideal for kitchens and bathrooms)
- Offers a more premium finish
Plaster Coving (Most Difficult)
- Heavy and fragile
- Requires skilled installation
- Best suited for high-end or heritage projects
Realistic Time Expectations for DIY Coving
- Small room: 3–5 hours
- Medium room: 1 full day
- Entire home: multiple days
Time depends heavily on your experience and how many corners you’re dealing with.
Is Coving Worth the Effort for Home Renovators?
For most Irish homeowners, the answer is yes.
Coving delivers:
- A more polished, high-end interior
- Increased perceived property value
- Strong visual impact for relatively low cost
It works especially well alongside:
- Ceiling roses
- Wall panelling
- LED coving (in modern builds)
For design-conscious homeowners, this is one of the highest-impact upgrades you can make.
Pro Tips for a Cleaner, More Professional Finish
- Always dry-fit before applying adhesive
- Use decorators caulk generously for gaps
- Sand and paint for a seamless look
- Choose paint-ready materials
These small steps make the difference between “DIY-looking” and professional-quality results.
Is Coving Easy to Fit? FAQs
Final Verdict: Is Coving a DIY Job or Not?
Here’s the balanced answer:
- Yes, coving is a DIY job for many homeowners
- No, it’s not ideal for complex or high-end projects
If you choose the right materials and set realistic expectations, DIY coving can be a rewarding and cost-effective upgrade.
Modern solutions—like those offered by Gaudi Coving—have made installation far more accessible, bridging the gap between professional results and DIY convenience.